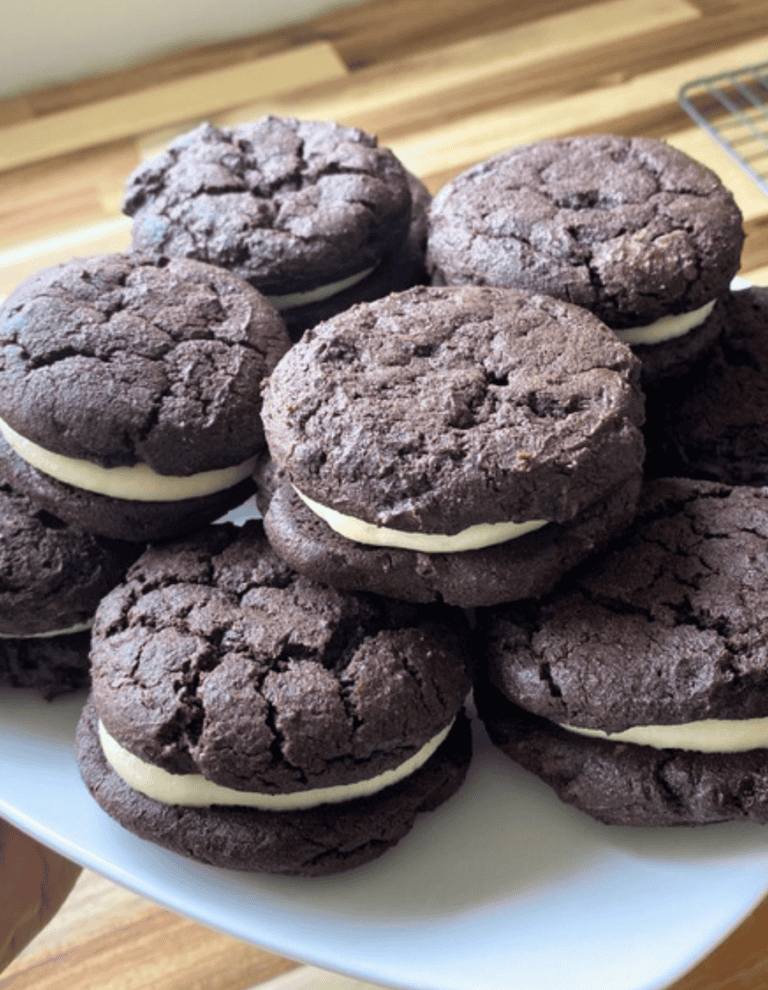
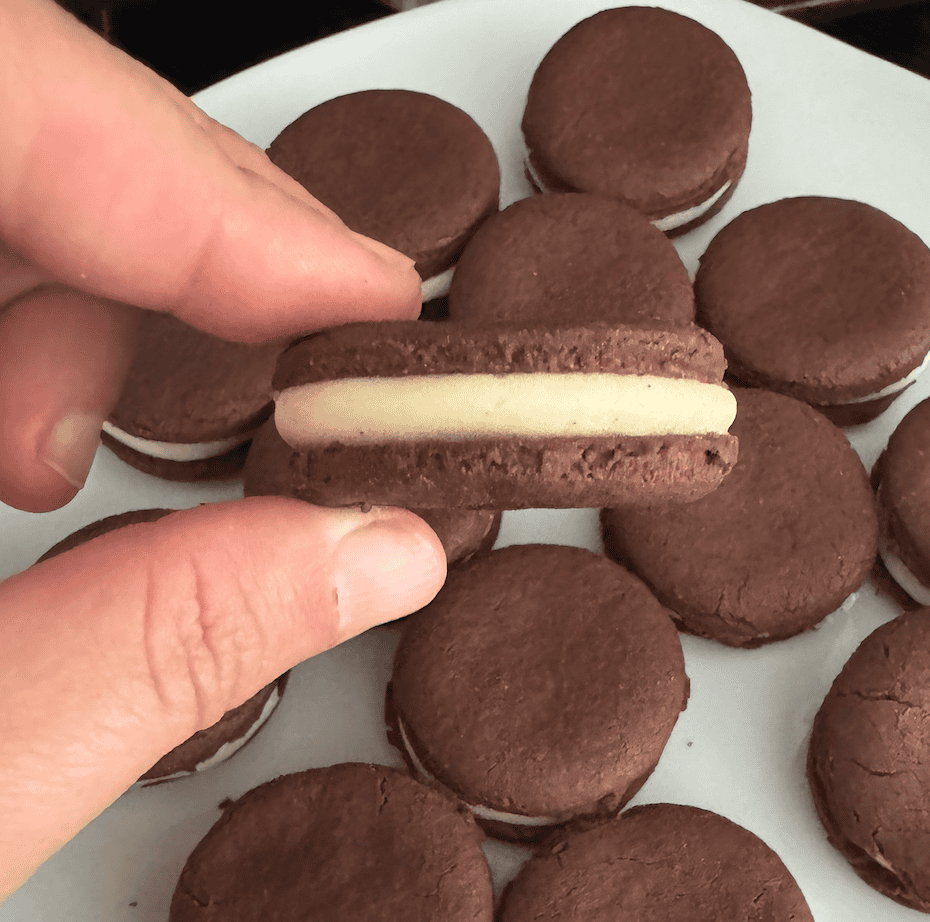
Not only are these homemade gluten-free Oreos so simple to make, they’re also crisp, deeply chocolatey, and filled with a smooth vanilla cream — without artificial dyes, corn syrup, or mystery ingredients.
They’re the perfect go-to recipe for crushing into fillings, folding into buttercream, or eating straight off the cooling rack.This is the exact cookie base used in my Cookies & Cream Cinnamon Rolls.
Why Make Homemade Gluten-Free Oreos?
– No artificial colors or flavors
– No corn syrup or preservatives
– Crisp texture that holds up in fillings
– Perfect for any and all cookies & cream desserts
Ingredients Overview
Full measurements are listed in the recipe card below.
Cookie Base Ingredients
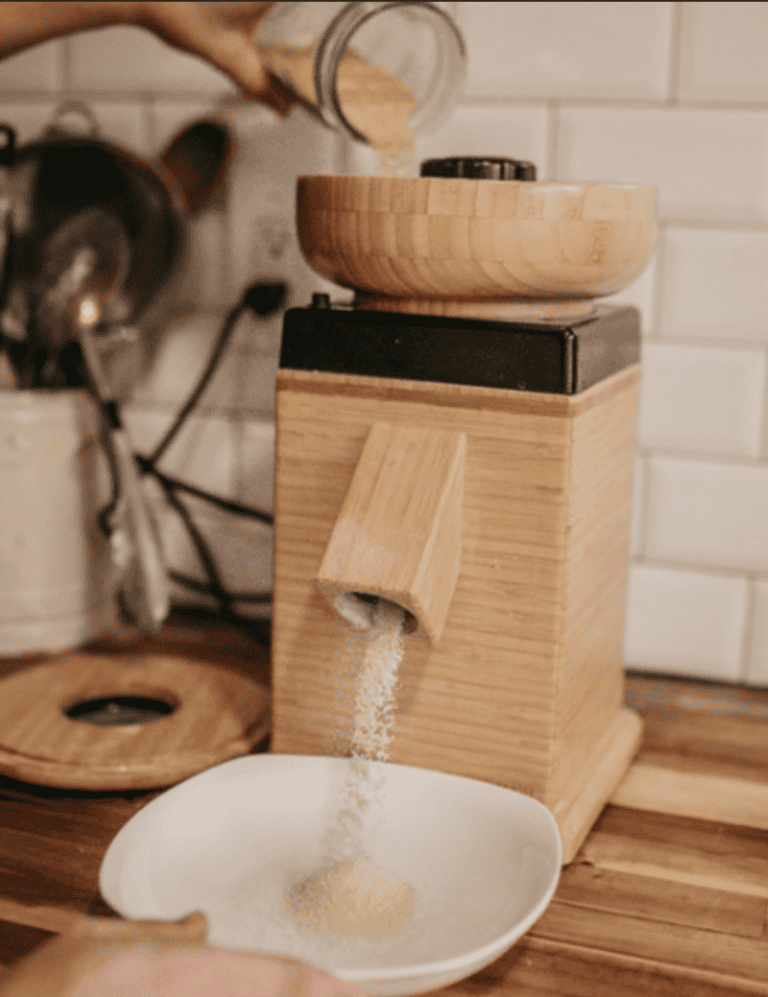
1. Gluten-Free One-to-One Flour
A high-quality gluten-free one to-one flour blend provides structure while keeping the cookies crisp, not crumbly. I prefer Bob’s Red Mill Gluten-Free 1-to-1 Baking Flour for this recipe because it produces consistent results and bakes evenly. Be sure to use a one-to-one blend that already contains xanthan gum.
2. Unsweetened Cocoa Powder
Unsweetened cocoa powder gives these cookie wafers their rich chocolate flavor without adding excess sweetness. For best results, sift the cocoa powder before mixing to remove any clumps. This ensures a smooth dough and even chocolate distribution. A high-quality cocoa powder makes a big difference in both color and depth of flavor.
3. Butter
Butter adds richness and helps create a crisp yet tender texture in the cookie wafers. Using a high-fat butter like Kerrygold works especially well here. If you need a dairy-free option, you can substitute a dairy-free butter alternative without issue.
4. Baking Powder
Baking powder gives the cookies just enough lift without making them cakey. I recommend using a corn-free and aluminum-free baking powder, which is easier on digestion and keeps the flavor clean. This is my go-to option for all gluten-free baking.
5. Salt
A small amount of salt balances the sweetness and enhances the chocolate flavor. Don’t skip it—it makes a noticeable difference.
6. Maple Syrup
Maple syrup provides natural sweetness while adding moisture and depth to the cookie dough. It also helps create a smooth, cohesive texture without refined syrups.
7. Maple Sugar
Maple sugar adds sweetness with a subtle caramel note that pairs beautifully with cocoa. Using maple sugar instead of refined white sugar keeps the flavor warm and well-balanced.
8. Vanilla Extract
Vanilla extract rounds out the chocolate flavor and adds warmth. Use a pure vanilla extract for the best results.
Vanilla Cream Filling Ingredients
This classic vanilla cream filling is smooth, lightly sweet, and the perfect contrast to the crisp chocolate cookie wafers.
1. Butter
Butter creates a rich, creamy base for the filling. A high-quality butter produces a smoother, more stable cream.
2. Vanilla Bean Paste
Vanilla bean paste adds a deeper vanilla flavor and those signature vanilla bean flecks. You can substitute vanilla extract if needed, but vanilla bean paste gives the best flavor.
3. Powdered Sugar
Powdered sugar sweetens the filling while keeping the texture smooth and pipeable. Sifting helps prevent lumps.
4. Raw Milk
Raw milk helps loosen the filling to the perfect consistency. Start with a small amount and add more as needed. If you prefer, regular milk or a dairy-free alternative can be easily subbed cup for cup.
Additional Allergens/Suggested Modifications
- Dairy: Sub out the cream cheese, butter, and milk for a dairy-free option.
This recipe is naturally free of: eggs, nuts, fish, crustacean shellfish, tree nuts, peanuts, wheat, soybeans, seed oils and sesame.
The Gluten Free Kitchen Cookbook Series
Healthy GLUTEN-FREE Recipes for Every Day LIFE
Your go-to cookbooks for all of the delicious & nutritious meals, sides, breads (yeast & sourdough), baking staples, snacks, desserts, drinks and more. With easy-to-follow instructions and beautiful step-by-step photography, every page invites you to explore nostalgic, healthy meals that make being gluten free a “get to” instead of a “have to”.
Whether you’re cooking for yourself or sharing with loved ones, The Gluten Free Kitchen Cookbook Series brings healthy living to your table every day.
How to Make Homemade Gluten-Free Oreos
Prepare Your Station
Line a cookie sheet with parchment paper or a silicone mat and set aside. Preheat the oven to 350°F.
Cookie Dough Base
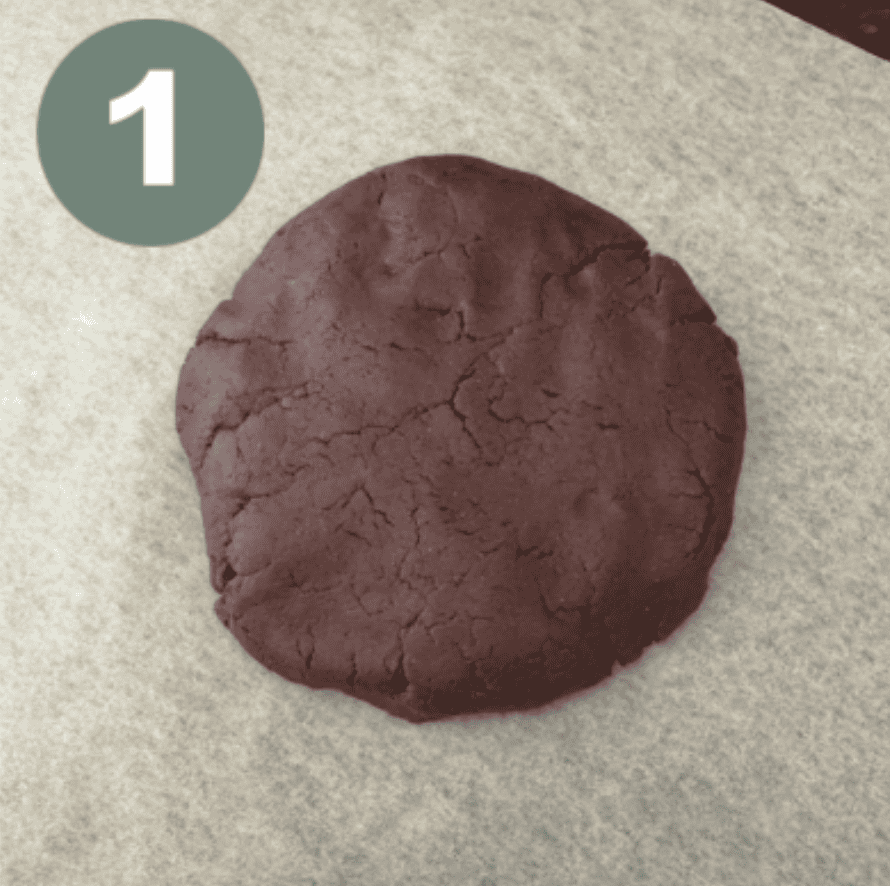
Step 1: Make the Dough
Mix all of the ingredients together until they are well combined. This should form a dough ball. Try squeezing the dough together into a ball and if it’s not forming naturally because the dough is too dry, add a dah more maple syrup until it comes together. This usually happens when different flours are subbed into the recipe.
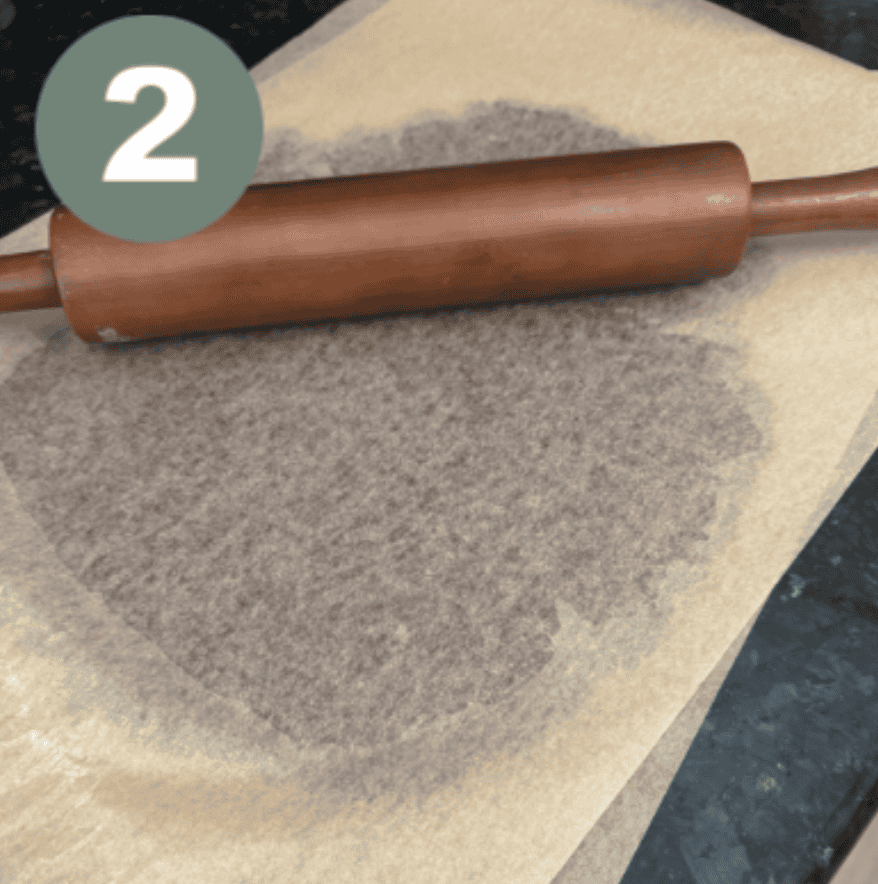
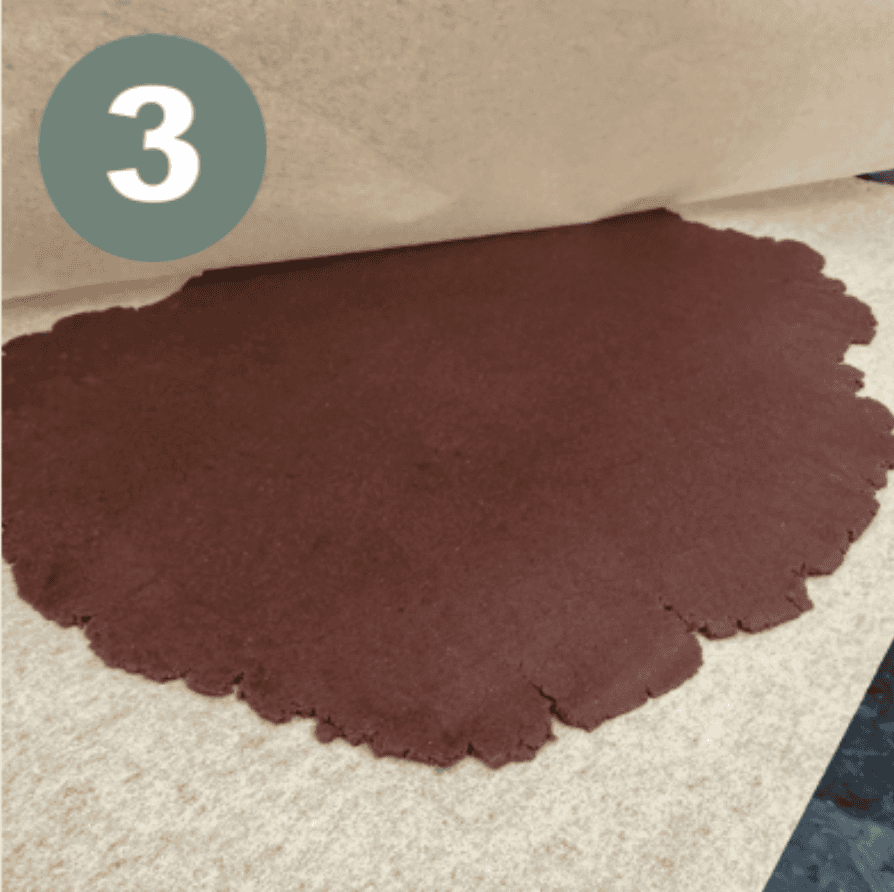
Step 2-3: Roll & Prep Dough
Place the dough ball between two pieces of non-bleached parchment paper. Use a rolling pin to roll the dough out until it’s roughly 1/8 of an inch thick. Then, remove the top layer of parchment paper.
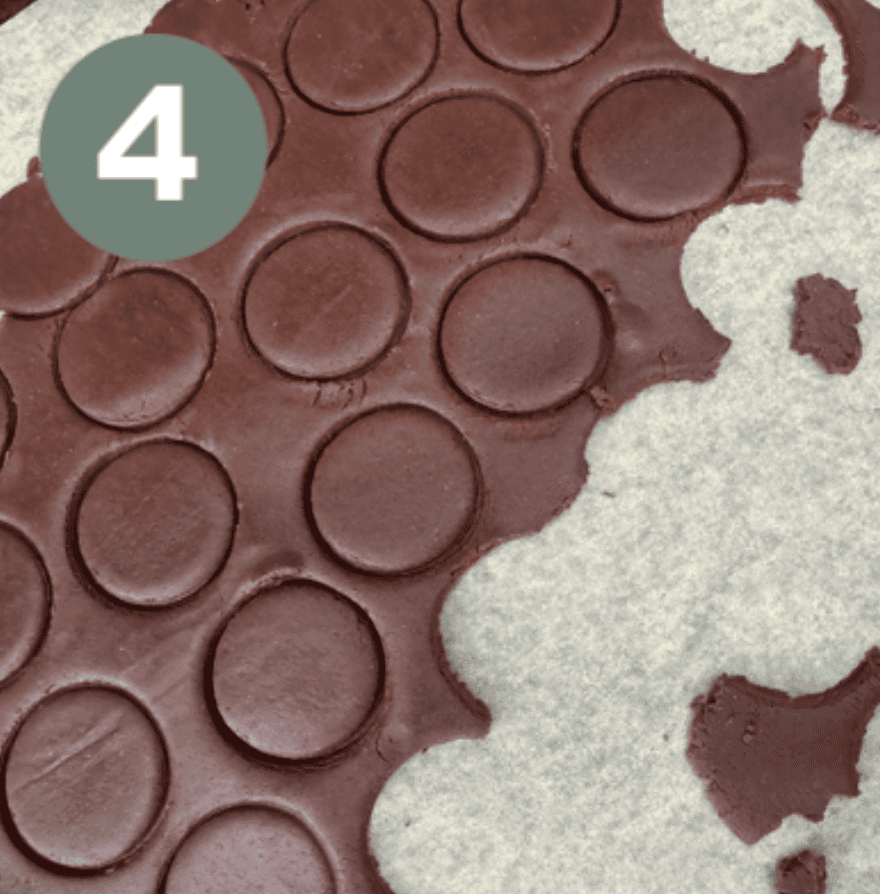
Step 4: Cut Cookies
Use a small circle cookie cutter to cut out disc shaped cookies and place onto a parchment paper lined baking sheet. Make sure to leave roughly an inch of spacing between the cookies.
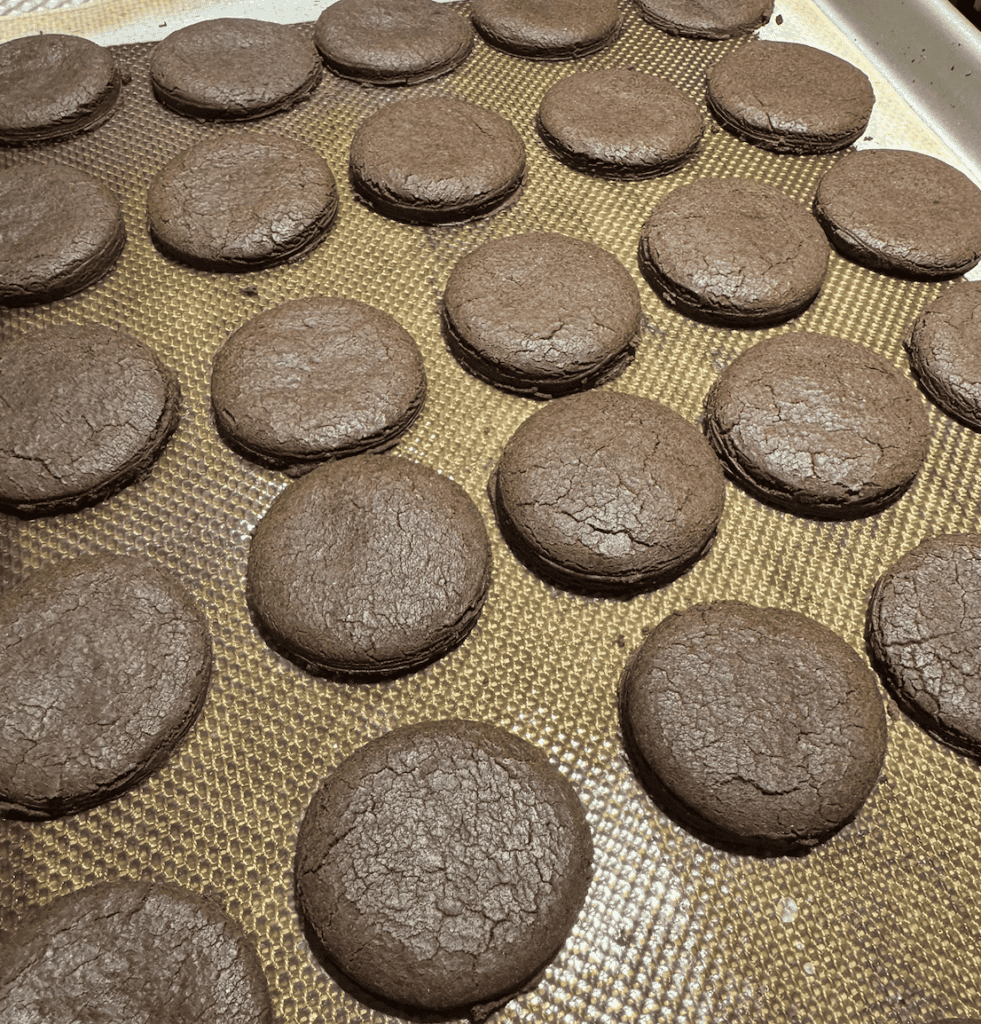
Step 5: Bake
Bake cookies for 10-12 minutes or until the cookie is baked with a little softness on the top (this will firm up once it cools).
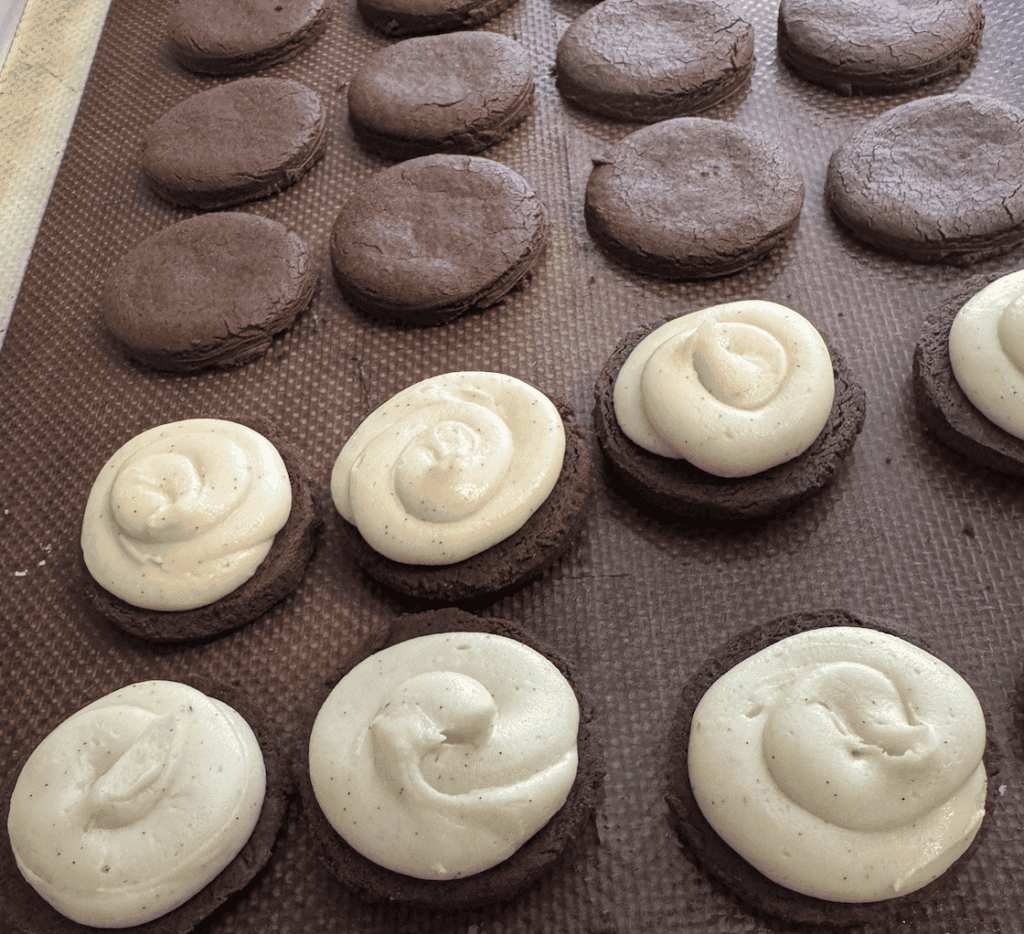
Step 6: Prepare the Icing
While the cookies are baking, mix together all of the icing ingredients. Make sure to slowly add in the milk so that you can read the icing and see how much it needs. You want a soft, yet structured icing. Nothing too runny or too firm.
Step 7: Fill the Cookies
When cookies are baked, allow them to cool and firm up for a few minutes. Once cooled, fill the cookies with icing and then move them to the refrigerator (or freezer if you’d like to save some for later).
Tips for Perfect Gluten-Free Oreo Cookies
- Roll dough evenly for consistent baking throughout the batch.
- Use unsweetened cocoa powder as your “flour” base when rolling out to help with the dough if it’s sticky.
- Let cookies cool fully before filling – this prevents the icing from melting and losing structure.
- Store the filled cookies in an airtight container in the refrigerator to maintain maximum freshness.
How to Use Homemade Oreos
This recipe is intentionally versatile.
- Crush and use for the filling inside of my Cookies & Cream Cinnamon Rolls.
- Fold into buttercream to give a cookies and cream icing effect.
- Chop into ice cream or brownies as a topping.
- Dip in batter and fry using my Fried Oreos recipe.
- Serve as classic chocolate sandwich cookies.
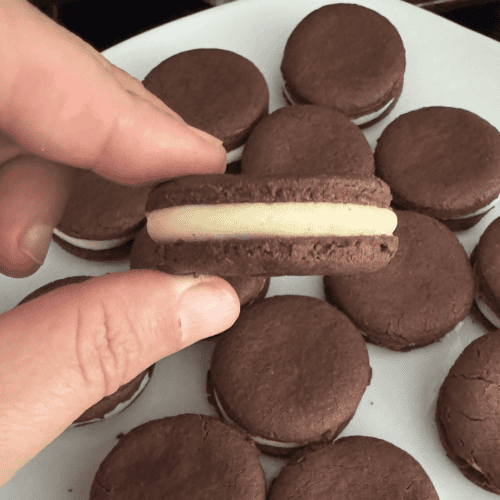
Homemade Gluten-Free Oreos (Chocolate Sandwich Cookies)
Ingredients
Chocolate Cookie Base
- 1 cup gluten-free one-to-one flour
- ½ cup cocoa powder
- ¼ cup butter softened
- ½ tsp baking soda
- 1 tsp baking powder
- ¼ tsp salt
- ¼ cup maple syrup
- ½ cup maple sugar
- ½ tsp vanilla extract
Vanilla Cream Filling
- ½ cup butter softened
- 1 ½ tsp vanilla bean paste
- 3 cups powdered sugar
- 1 ½ tbsp raw milk
Instructions
Make the Chocolate Cookies
- Preheat oven to 350°F.
- Line a baking sheet with parchment paper or a silicone baking mat and set aside.
- In a mixing bowl, combine all cookie ingredients until fully incorporated. The mixture should form a dough ball.
- If the dough feels dry, add a small splash of maple syrup until it comes together.
- Place dough onto a sheet of parchment paper and cover with a second sheet of parchment.
- Roll dough to about ⅛-inch thickness, then remove the top parchment layer.
- Use a small round cookie cutter to cut disc-shaped cookies and place them on the prepared baking sheet.
- Space cookies about 1 inch apart.
- Bake for 10–12 minutes, until set with slight softness on top. Cookies will firm up as they cool.
- Allow cookies to cool completely before filling.
Make the Filling
- In a bowl, mix softened butter, vanilla bean paste, and powdered sugar.
- Slowly add raw milk, a little at a time, until a thick, firm, pipe-able consistency is achieved.
Assemble the Cookies
- Pipe or spread filling onto the flat side of half the cookies.
- Top with remaining cookies to create sandwich cookies.
- Transfer assembled cookies to the refrigerator to set, or freeze for longer storage.
Notes
- Cookies crisp up as they cool—avoid overbaking.
- Rolling the dough evenly is key for uniform sandwich cookies.
- Store in an airtight container in the refrigerator for up to 7 days.
- Freezer friendly.
Prep/Storage Options:
- Pre-Prep: The cookie shells can be prepped ahead of time and stored in an airtight container in the pantry until ready to fill with icing, or in the freezer for a longer term storage option. The icing can also be pre-prepped and stored in the refrigerator for up to a week or the freezer for up to 6 months as long as it’s store in a freezer safe air tight container.
- Storage: Once assembled, store the cookies in an airtight container in the refrigerator. Store assembled cookies in the freezer in a gallon sized bag or airtight container for up to 6 months.
FAQ’s
Roll the dough thin and bake until set but not burnt. Gluten-free chocolate cookies continue to firm up as they cool, so letting them cool completely on the pan helps achieve that classic crisp Oreo-style texture.
Yes. Substitute dairy-free cream cheese, butter and milk in both the cookies and filling. Many dairy-free butter alternatives work well and still produce crisp cookies and a creamy center.
Store assembled cookies in an airtight container at room temperature for up to 3 days, or refrigerate for up to a week. Keeping them sealed helps maintain the crisp cookie texture and prevents the filling from drying out.
Yes. Freeze baked cookies (filled or unfilled) in an airtight container for up to 6 months. Thaw at room temperature before serving for the best texture.
Absolutely. These gluten-free Oreos crush beautifully for cookies-and-cream frostings, cinnamon rolls, cheesecakes, or ice cream toppings — making them a great base recipe for multiple nostalgic desserts.
Homemade Oreos let you control the ingredients — avoiding seed oils, artificial dyes, corn syrup, and preservatives often found in packaged cookies. You also get fresher flavor and a texture you can customize from crisp to slightly soft.
No! These are naturally oat free which decreases the risk of cross contamination via oats!
Get on the List
Subscribe to Receive the Gluten Free Pantry Must Haves Ebook