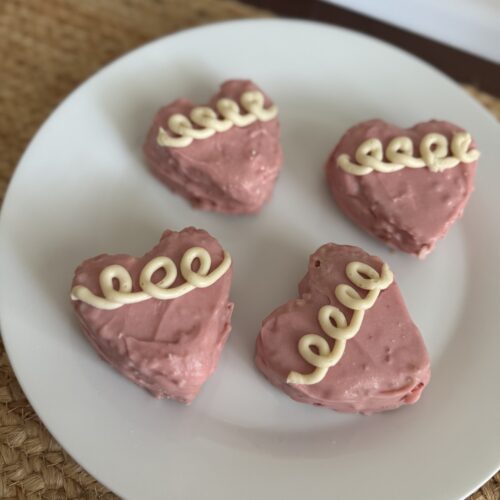
Copycat Gluten-Free Valentine's Heart Cakes
These Copycat Valentine’s Heart Cakes are soft, chocolatey, and filled with fluffy cream—just like the sweet lunchbox treat you remember, but made with clean, simple ingredients. Moist, fresh milled, gluten-free cake layers sandwich a dreamy vanilla filling, then get coated in rich chocolate for that classic, nostalgic finish. No artificial dyes, no preservatives, no mystery ingredients—just real food made extra special. Perfect for Valentine’s Day, gifting, or bringing back a little childhood magic in the best homemade way.
Ingredients
Cake
- 1 1/4 cups Millet Flour
- 3/4 cup Arrowroot Powder
- 3/4 cup Brown Rice Flour
- 1/2 cup Maple Sugar
- 1 cup Maple Syrup
- 2 1/2 tsp Baking Powder
- 1/2 tsp Baking Soda
- 1/2 tsp Salt
- 1/2 cup Butter Softened
- 2/3 cup Raw Milk
- 4 Egg Whites
- 2 tsp Vanilla Bean Paste
Filling
- 1/2 cup Butter Softened
- 3 cups Powdered Sugar
- 2-4 TBSP Raw Cream
- 1 tsp Vanilla Extract
Coating
- 24 oz White Chocolate Chips
- 1-2 TBSP Coconut Oil
- 3-6 tsp Raspberry Powder for coloring (and flavor)
Instructions
- Preheat the oven to 350°F.
- Whisk the wet and dry ingredients until well combined.
- Pour the batter into a lined cookie sheet and bake for 18-20 minutes.
- Allow the cake to cool and use a heart shaped cookie cutter to cut out shapes.
- Place the hearts into the freezer to firm up.
- While the hearts are in the freezer, whip up the icing ingredients in a bowl.
- Place the icing in a piping bag and fill the heart sandwiches with a layer of icing.
- Once all the sandwiches are filled, place in the freezer for the filling to harden. Note: The size of my pan for my countertop oven (15x10) made my cake too thick for my liking. Once the cakes were frozen, I was able to easily cut the outer edges in half and double the amount of sandwiches I used.
- Prep the coating by heating up the chocolate and coconut oil in a double broiler. Note: The coconut oil should be added in little by little if needed. Sometimes when you're heating your chocolate, it overheats and the coconut oil acts as a thinner to keep a more loose consistency for coating
- Once melted, add 3-6tsp of raspberry powder (depending on how rich you want the flavor + color to be, I used 6) to the chocolate and stir until well combined.
- Coat the frozen cakes in chocolate until well covered.
- Place the cakes in the refrigerator for the chocolate coating to firm up.
- Once firm, use leftover vanilla icing to pipe on the iconic design (you could use melted chocolate like normal people, but my family prefers icing!) - or - skip that part and just eat them as is!
- Since they are so rich in flavor, we love to cut them in half and serve.
Notes
I love to make these in stages. I'll bake, cut and freeze the cakes first, then when I have time I'll whip up icing and fill them and re-freeze to firm everything up. Then, when I have more time, I'll prep the chocolate and dip them + refreeze. It's so simple to make this recipe work around a busy schedule instead of doing it all from start to finish.
The cakes store wonderfully in the freezer in an airtight container once finished for up to 6 months of storage or they store well in an airtight container in the refrigerator for a week.
You could store them on the countertop if you're in a cooler climate, but here in Florida the chocolate just melts.